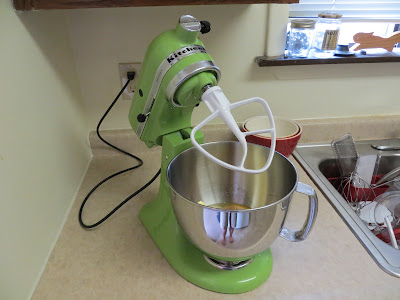
While my birthday isn't officially until Wednesday, my mom arranged a small surprise get together yesterday and presented me with every baker's dream: the coveted stand mixer. A group of about half a dozen family members all pitched in to make it possible, so thank you, thank you, thank you!
Needless to say I squealed with delight and started planning my first baking endeavor with my new toy.
Her name, you ask? That would be Maleficent. I know it might sound strange to have named a stand mixer, an instrument of pure joy and elation, after a Disney villain, but I have my reasons:
- She's green. (Green Apple, to be exact)
- She's wicked. (Wicked awesome)
- All of my other appliances are afraid of her. (Maleficent is The Mistress of All Evil, afterall)
I thought the most appropriate treat to conjure up first would be the classic chocolate chip cookie...but with a twist. The main cookie recipe comes out of the book that came with the mixer, Instructions and Recipes for your Kitchenaid Stand Mixer. The caramel recipes comes from Epicurious...stay tuned.
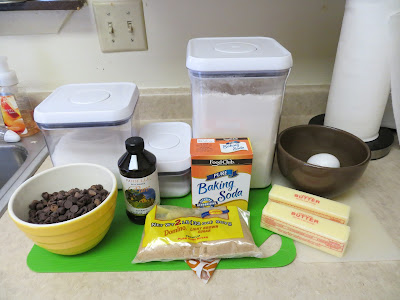
1 cup granulated sugar
1 cup brown sugar
1 cup (2 sticks) butter or margarine, softened
2 eggs
1 1/2 tsp vanilla
1 tsp baking soda
1 tsp salt
3 cups all purpose flour
12 ounces semi-sweet chocolate chips
Fleur de sel caramel (Find recipe here)
Directions:
Place sugars, butter, eggs, and vanilla in mixer bowl. Attach bowl and flat beater to mixer. Turn to Speed 2 and mix about 30 seconds. Stop and scrape the bowl. Turn to Speed 4 and beat about 30 seconds. Stop and scrape the bowl.
Turn to Stir Speed. Gradually add baking soda, salt, and flour to sugar mixture and mix about 2 minutes. Turn to Speed 2 and mix about 30 seconds. Stop and scrape the bowl. Add chocolate chips. Turn to Stir Speed and mix about 15 seconds.
Drop rounded teaspoonfuls onto greased baking sheets (or use a silicone baking mat for easy clean up), about 2 inches apart. Bake at 375° for 10 to 12 minutes. Remove from baking sheets immediately and cool on wire racks.
If desired, place caramel chunks on top of cooling cookies. The residual heat will melt the caramel enough, but not burn it as it would do in the oven.
Pictures:
 |
| Maleficent with bowl and flat beater attached |
 |
| Sugars, butter, eggs, and vanilla added to bowl |
 |
| Sugars, butter, eggs, and vanilla mixed |
 |
| Baking soda, salt, and flour mixture |
 |
| Dry ingredients added to wet ingredients, and chocolate chips added |
 |
| Frozen caramel, chopped |
 |
| Caramel on top = fail |
 |
| Caramel on bottom = fail |
 |
| Now we're getting somewhere... |
 |
| Ah-ha! Caramel added after cookie is cooked doesn't burn! |
Hints and tips:
What can I say, the stand mixer did all of the work and somehow even the batter just tastes better, so I have no comment on the chocolate chip cookie part. Let's move on to the caramel.
I had made a ton of caramel using the above recipe from Epicurious and was literally drowning in it, so I thought to use it in a side recipe. One can only eat so much caramel and even I have my limits. I tried three different methods of incorporating the caramel into this recipe: placing a frozen chunk on top of the dough before putting into the oven, placing a frozen chunk under the dough before putting into the oven, and placing a frozen chunk on top of the cooked cookie as it's cooling.
None of these methods worked perfectly, so next time I'm going to melt the caramel and do a drizzle. That would allow the caramel to spread more evenly instead of pooling as it melts.
Another handy tip I've learned is that for what society would deem a "reasonable" sized cookie, you can use a melon-baller to get the rounded teaspoon measurement. Of course, I eat these cookies two or three at a time, so, take that society.
Another multi-purpose tool is the ice cream scoop, of course. It provides the perfect measurements for muffins and cupcakes...or for a scoop of vanilla ice cream to make these chocolate chip caramel cookies into a sandwich...enjoy!

No comments:
Post a Comment