Friday, August 31, 2012

Dark Magic Chocolate Chip Cookie Ice Cream Sandwiches

Do I have a treat for you today!  Remember those chocolate chip cookies I made a while back?  Well, I've made that recipe a half a dozen times now because I just cannot get enough of those cookies!  More on that later...

Today, I'm sharing another ice cream recipe!  This one comes from a book that my friends Sarah and Adam got me for my birthday.  (Hi, guys!)

The book is called Jeni's Splendid Ice Creams at Home by Jeni Britton Bauer.  This book has some really unique and interesting ice cream recipes in it.  It also gives suggestion based on the time of the year.  To that, I say, thanks for the suggestion, but I'm making whatever I want whenever I feel like it...like today!

One of her "Autumn" recipes, along with such concoctions as Plum Pudding Ice Cream and Sweet Potato Ice Cream with Torched Marshmallows, is what sounds like a simple, straight-forward chocolate recipe.  She calls it "The Darkest Chocolate Ice Cream in the World."

Ingredients:

Chocolate syrup:
1/2 cup unsweetened cocoa powder
1/2 cup brewed coffee
1/2 cup sugar
1 1/2 ounces bittersweet chocolate (55% to 70%), finely chopped

Ice cream base:
2 cups whole milk
1 tablespoon plus 1 teaspoon cornstarch
1 1/2 ounces (3 tablespoons) cream cheese, softened
1/8 teaspoon fine sea salt
1 cup heavy cream
1/2 cup sugar
2 tablespoons light corn syrup


Directions:

First, there's some prep work to do.

For the chocolate syrup:
Combine the cocoa, coffee, and sugar in a small saucepan and bring to a boil over medium heat, stirring to dissolve the sugar.  Boil for about 30 seconds.

Remove from heat, add the chocolate, and let stand for 5 minutes.

Stir until smooth and then set aside.

For the ice cream base:
Mix about 2 tablespoons of the milk with the cornstarch in a small bowl to make a slurry.

Whisk the cream cheese, warm chocolate syrup, and salt in a medium bowl until smooth.

Now that the prep is done, you're ready to start cooking.

In a saucepan, combine the remaining milk (1 3/4 cups plus 2 tablespoons), the cream, sugar and corn syrup.  Bring to a rolling boil and cook for about 4 minutes.

Remove from heat and gradually whisk in the cornstarch slurry.  

Bring the mixture back to a boil over medium-high heat and cook, stirring with a heatproof spatula, until slightly thickened, about 1 minute.  Remove from heat.

Gradually whisk the hot milk mixture until the cream cheese mixture until smooth.  Cover mixture with plastic wrap and let chill thoroughly in the fridge.

Once the mixture is chilled, follow your ice cream maker's instructions!

Oh, and while you're waiting for the ice cream to freeze, make some chocolate chip cookies...

Pictures:
Combine cocoa, coffee, and sugar in a saucepan
After chocolate has been added and stirred until smooth

Milk and cornstarch

Mix to create a slurry

Whisk cream cheese, salt, and chocolate syrup until smooth

Cream cheese mixture

Milk, cream, sugar, and corn syrup

Thickened base


Whisk milk mixture into cream cheese mixture
Another shot


Finished base ready to be chilled
Once chilled, add to ice cream machine
Ready to put in the freezer
Remember those chocolate chip cookies?  This is why.


Tips:

Really, just one.  There is coffee in this recipe and you can control the level of earthiness in the final product depending upon what kind of coffee you use.  I used a really good coffee that I got in Valencia, Spain, and it still comes through pretty deep in the final ice cream.  If you want a more subtle flavor, use a weaker coffee!

Also, this book calls for an ice bath to chill the ice cream base.  Forget that, who has the counter space?  And we don't have an ice machine in our freezer, so...Chilling in the fridge worked just fine for me!

Wednesday, August 29, 2012

Pasta Shells with Mustard Green Pistachio Pesto & Sausage

Who doesn't love a pasta dish?  But, there's nothing that gripes me more than going to an Italian restaurant and paying $10-$20 for pasta!  That's crazy!  I think people are scared of pasta at home.  And I think it's because of the sauce.  Well, fear no more!

This recipe comes from one of the most entertaining, informative, and all around awesome chefs I've ever seen, Anne Burrell, from her new cookbook Cook Like a Rock Star: 125 Recipes, Lessons, and Culinary Secrets.

Her original recipe is called Orecchiette with Broccoli Rabe Pesto & Sausage.  Great.  I was super excited for this dish...until I got to the grocery store.  No broccoli rabe and no orecchiette (pasta shaped like ears).  Bummer!  So, I had to improvise and thus here you have my Burrellian inspiration with a twist!

Don't get me wrong, substitutions are completely acceptable and shouldn't deter you from making a dish.  Even with a few alterations, this dish was super tasty!

Let's start with the pesto.  Pesto simply means crushed, so don't think you're limited to the traditional garlic, basil, and pine nuts.  Anything will do, so play with it!


Ingredients:
2 bunches of mustard greens or other dark leafy green
1/2 cup chopped pistachios
3/4 cup freshly grated parmigiano
1/4 cup mascarpone
Extra virgin olive oil
Salt

Directions:
Break off the tough lower part of the stem of the greens and then roughly chop the leafy part.  It may look like a ton of greens, but it will reduce greatly as soon as it cooks!  Rinse these greens well.  Mine were extremely dirty!  A good wash will do the trick.

Bring a large pot of water to a boil and salt it well.  Drop the greens into the water, swirl them about, and then immediately remove them!  Don't dump the water, as we'll be using it for the pasta later.

Reserve about a cup of the greens and put the rest in a food processor.  Pulse it until it's a coarse paste.  Add the pistachios and parmigiano and purée until smooth.

If the mixture seems a little dry, you can drizzle in some olive oil as the machine is running.

Add the mascarpone and pulse until combined.  Salt to taste and then set aside.  As Anne says, "It should be slightly bitter, nutty, and creamy at the same time."

That's it!  Congratulations, you just made pesto!

Pictures:
Two bunches of mustard greens, shocked in hot water
Add to food processor and pulse until coarse


Add pistachios and parmigiano and purée until smooth

Add mascarpone and pulse to combine


Finished pesto


The pasta is super easy, too.  

Ingredients: (Sorry, I forgot to take a picture, but it's just a few ingredients!)
1/2 lb Italian sausage (sweet or spicy)
1 pound medium shell (or similar pasta)
Parmigiano
Extra virgin olive oil

Directions:
To begin, brown 1/2 pound of Italian sausage in a large sauté pan coated with olive oil over medium-heat for about 8-10 minutes or until brown and crumbly.

Meanwhile, bring the water back up to a boil and dump in your pasta.  Cook about one minute less than the box recommends.

Once cooked, drain the pasta, reserving about 1/2 cup of the liquid.

Add the pasta, reserved liquid, the reserved greens from the pesto, and about 2/3 of the pesto to the pan with the sausage.  Stir to combine and cook until the water evaporates and the pesto is clinging to the pasta.  

Remove from heat and drizzle with olive oil.  Sprinkle with parmigiano and stir to combine.

Serve it up and enjoy immediately!  I would also recommend another topping of parmigiano!

Here are some pictures of the sausage and bringing everything together!


Brown the sausage
Sausage browning

Add pasta, reserved pasta water, reserved greens, and pesto

Add some olive oil and parmigiano and stir to combine

Finished product with some extra parmigiano on top!


Coming soon...

Busy, busy, busy!

I'm failing at this whole blogging thing...sorry!  School and work has started back up and I'm still getting back into the routine.

I do, however, have a blog post coming soon!  Just have to type it all up and get all the pictures and formatting done...all that blog stuff.  It's a pasta dish with a homemade pesto, so stay tuned!

Monday, August 20, 2012

Spicy Brownies with Vietnamese Cinnamon Gelato

Here it comes, my ice cream debut!  But what's ice cream without a succulent, warm brownie?  It'd still be pretty tasty, of course, but brownies make it better!

Today I'll be sharing one of my absolute favorite brownie recipes.  It also just so happens to be one of the simplest. The flavors that come through are just spectacular, spicy and rich, and pack just a bit of heat to make you remember that these are no ordinary brownies.

The recipe is adapted from Aaron Sanchez' Mexican Brownies recipe available here.  

I have mixed feelings on cocoa powder.  I bought a really good quality one from Penzeys Spices that I really enjoy using, but there's something to be said about Hershey's Special Dark, as well.  This time, since I'm pairing it with the cinnamon ice cream, I decided to go with the Penzeys.  If I were just serving the brownie with a scoop of vanilla, I'd go dark.  

And instead of canela, Mexican cinnamon, I used the same Vietnamese cinnamon that the ice cream calls for.  P.S. the Vietnamese cinnamon is also from Penzeys.  Don't know about Penzeys?  Click here.  You're welcome.


Ingredients:

2 sticks unsalted butter (plus more for greasing)
2 cups sugar
4 large eggs
2 teaspoons pure vanilla extract
2/3 cup good quality unsweetened cocoa powder
1 cup all-purpose flour
1 teaspoon ground Vietnamese cinnamon
1/4 teaspoon cayenne pepper powder
1/2 teaspoon salt
1/2 teaspoon baking powder


Directions:

Preheat oven to 350°.  

Grease a 9x13 baking dish with butter.  Grease it well so the brownies won't stick!

Melt the 2 sticks of butter in a large sauce pan over medium-low heat; do not boil.  Remove from the heat and let cool slightly.

Combine the sugar, eggs, and vanilla in a bowl and mix until incorporated.  Add the mixture to the slightly cooled butter and stir with a wooden spoon until combined.

Pass the cocoa, flour, cinnamon, cayenne, salt, and baking powder through a sifter or sieve to avoid lumps.  Add flour mixture to the sauce pan and mix until smooth.

Spread the batter in the prepared pan and bake until a toothpick inserted in the middle comes out fudgy. About 20-25 minutes.  Let cool at least slightly before digging in!  (They're hard to resist!)

Pictures:

Melt the butter in a large saucepan
Combine sugar, eggs, and vanilla in a bowl


Mix until incorporated


Cocoa powder, flour, cinnamon, cayenne, salt, baking powder

Sifted dry ingredients

Add egg mixture to slightly cooled butter


Add dry ingredients and mix until smooth
Greased baking dish

Spread prepared mixture

Let cool if you can resist!


Tips:


For the brownies, the original recipe suggests using parchment paper to cover the bottom of the pan to prevent the brownies from sticking.  I personally HATE parchment paper and think it's one of the most spiteful contraptions in my kitchen.  On the other hand, I LOVE butter (who doesn't?) and feel that perhaps all that butter I used to grease the dish helps with the gooey goodness.  By the way, I used about 1 to 1 1/2 tablespoons of butter just to grease the dish.  Oops.

Above I said to combine the eggs, sugar, and vanilla before adding it to the butter.  Why?  Because I like to think that it helps with the texture and from keeping the eggs from cooking in the cooled, but still warm, butter.  It also gives me something to do while all that butter melts.

And now for the ice cream!  Or, rather, gelato!

One of the three ice cream recipe books I got for my birthday came from my roommate.  It's called Scoop: 125 Specialty Ice Creams from the Nation's Best Creameries by Ellen Brown.  As the title suggests, the recipes are all adaptations of ice creams found in creameries across the nation.  This one is adapted from Cold Fusion Gelato in Newport, RI.  How cool is that?! (Pun intended.)


Ingredients:

2 1/2 cups whole milk, divided (2 cups and 1/2 cup)
3/4 cup heavy whipping cream
1/2 cup granulated sugar
1/4 cup light corn syrup
1 to 1 1/2 teaspoons ground Vietnamese cinnamon
1/8 teaspoon kosher salt
2 Tablespoons nonfat dry milk powder
2 Tablespoons cornstarch
1/4 teaspoon pure vanilla extract


Directions:

Combine 2 cups of milk, cream, sugar, corn syrup, cinnamon, and salt in a saucepan.  Cook over medium heat, stirring frequently, until the mixture begins to steam; do not let boil!

Meanwhile, combine the remaining 1/2 cup milk, milk powder, cornstarch, and vanilla extract in a small bowl and stir until smooth.  Make sure both powders have dissolved.

Add the cornstarch mixture to the pan and bring to a boil over low heat, stirring constantly.  This will take time!

Whisk the mixture until smooth and simmer it over low heat stirring constantly for about two minutes or until it starts to thicken.  If lumpy, strain it through a sieve.

Transfer the hot liquid to a bowl and press a sheet of plastic wrap directly onto the surface of the mixture to prevent a skin from forming.  Refrigerate until it is completely chilled, 6-8 hours or overnight.

Freeze the mixture according to your ice cream machine's instructions.  Serve immediately for a soft gelato, or transfer to an airtight storage container and freeze until hard.  Allow the gelato to sit at room temperature for 15 minutes before serving if frozen solid.

Pictures:

Milk, cream, sugar, corn syrup, cinnamon, and salt
Remaining milk, milk powder, cornstarch, and vanilla

As the mixture heats, the ingredients come together

Once the base is chilled, add to ice cream machine


A delicious closeup
Final product packaged and ready to eat or freeze!


Tips:

For the gelato, remember that this is my first attempt, so I may not yet know what I'm talking about!  

Once the mixture passed through my ice cream maker attachment, I used a 32oz yogurt container as the storage container.  I put all the ice cream from the machine into the tub and then covered it with plastic wrap before putting the lid on.  I then stored it upside down because I saw on Unwrapped that that's what you're supposed to do to avoid air getting trapped under the lid!

If you don't have an ice cream maker, let the mixture chill completely and then put it in the freezer.  Stir every 20 minutes or so until it reaches the desired consistency.  It's time and labor intensive, but should work.  I made ice cream once before this way and it worked out pretty well!

Putting it all together:


If you make the gelato in advance and it's ready when the brownies are done, by all means yank that still warm brownie out of the pan and scoop away.  

If you're like me and not that coordinated, plate up a brownie, pop it in the microwave for a few seconds and then top it with a scoop of gelato!  

If you really wanted to get decadent, throw some heavy whipping cream into your mixture and whip it up for fresh whipped cream!  Whipped cream!  And then you could top with a maraschino cherry and maybe some sprinkles and nuts...ok, I'm getting ahead of myself.  While the sundae is always an excellent option, let's keep it simple and just (just? ha!) do a warm, gooey spicy brownie with a scoop of fresh, cool, yet spicy gelato.  Delicious!

Enjoy!  And please comment so I know you're out there!  If you're trying these recipes I want to know and am completely open to suggestions!

Be jealous.  I got to eat this! (And, yes, I let it melt a little for dramatic effect.)

Sunday, August 19, 2012

Coming soon...

I've been really busy the past few days and haven't spent much time in the kitchen, but am planning on getting back in there this week, I promise!

Last Thursday my roommate and our neighbors left for a weekend in St. Louis.  Besides doing the City Museum and the Arch (and visiting The Schafly Tap Room, Morgan Street Brewery, and the Donut Drive-In) we participated in the Run For Your Lives Zombie 5K.  That, coupled with the City Museum, has made any sort of movement beyond blinking difficult, but once I recover I'll be back in the kitchen!

As you know last week was also my birthday, and boy did I make out like a bandit.  Amongst my gifts were three ice cream recipe books to go along with Maleficent and that shiny ice cream maker attachment that's quite literally chilling in the freezer.  So, I think my next official post will be ice cream! 

In the meantime, I found out this year (or had forgotten and re-found out) that I share a birthday with none other than Julia Child.  So, here's to her and her 100th birthday:

Sunday, August 12, 2012

Chocolate Chip Caramel Cookies

Good afternoon!  After blowing up my kitchen last week, I needed a break, so please excuse my absence the past couple of days.  I come to you today, however, with a very special post...

While my birthday isn't officially until Wednesday, my mom arranged a small surprise get together yesterday and presented me with every baker's dream: the coveted stand mixer.  A group of about half a dozen family members all pitched in to make it possible, so thank you, thank you, thank you!

Needless to say I squealed with delight and started planning my first baking endeavor with my new toy.

Her name, you ask?  That would be Maleficent.  I know it might sound strange to have named a stand mixer, an instrument of pure joy and elation, after a Disney villain, but I have my reasons:

  1. She's green.  (Green Apple, to be exact)
  2. She's wicked.  (Wicked awesome)
  3. All of my other appliances are afraid of her.  (Maleficent is The Mistress of All Evil, afterall)
I thought the most appropriate treat to conjure up first would be the classic chocolate chip cookie...but with a twist. The main cookie recipe comes out of the book that came with the mixer, Instructions and Recipes for your Kitchenaid Stand Mixer.  The caramel recipes comes from Epicurious...stay tuned.

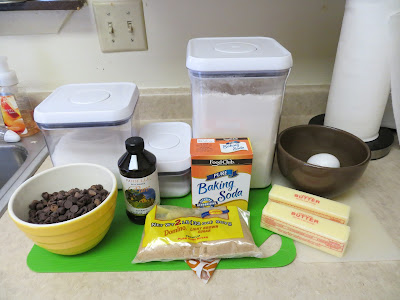
Ingredients laid out

Ingredients:
1 cup granulated sugar
1 cup brown sugar
1 cup (2 sticks) butter or margarine, softened
2 eggs
1 1/2 tsp vanilla
1 tsp baking soda
1 tsp salt
3 cups all purpose flour
12 ounces semi-sweet chocolate chips
Fleur de sel caramel (Find recipe here)


Directions:
Place sugars, butter, eggs, and vanilla in mixer bowl.  Attach bowl and flat beater to mixer.  Turn to Speed 2 and mix about 30 seconds.  Stop and scrape the bowl.  Turn to Speed 4 and beat about 30 seconds.  Stop and scrape the bowl.

Turn to Stir Speed.  Gradually add baking soda, salt, and flour to sugar mixture and mix about 2 minutes.  Turn to Speed 2 and mix about 30 seconds.  Stop and scrape the bowl.  Add chocolate chips. Turn to Stir Speed and mix about 15 seconds.

Drop rounded teaspoonfuls onto greased baking sheets (or use a silicone baking mat for easy clean up), about 2 inches apart.  Bake at 375° for 10 to 12 minutes.  Remove from baking sheets immediately and cool on wire racks.  
If desired, place caramel chunks on top of cooling cookies.  The residual heat will melt the caramel enough, but not burn it as it would do in the oven.

Pictures:

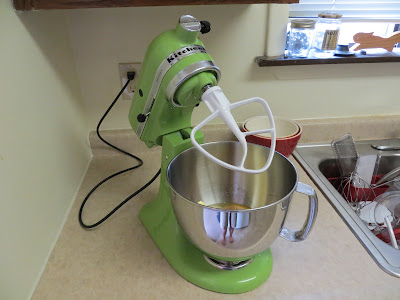
Maleficent with bowl and flat beater attached
Sugars, butter, eggs, and vanilla added to bowl
Sugars, butter, eggs, and vanilla mixed

Baking soda, salt, and flour mixture
Dry ingredients added to wet ingredients, and chocolate chips added
Frozen caramel, chopped
Caramel on top = fail
Caramel on bottom = fail
Now we're getting somewhere...
Ah-ha!  Caramel added after cookie is cooked doesn't burn!


Hints and tips:

What can I say, the stand mixer did all of the work and somehow even the batter just tastes better, so I have no comment on the chocolate chip cookie part.  Let's move on to the caramel.

I had made a ton of caramel using the above recipe from Epicurious and was literally drowning in it, so I thought to use it in a side recipe.  One can only eat so much caramel and even I have my limits.  I tried three different methods of incorporating the caramel into this recipe: placing a frozen chunk on top of the dough before putting into the oven, placing a frozen chunk under the dough before putting into the oven, and placing a frozen chunk on top of the cooked cookie as it's cooling.  

None of these methods worked perfectly, so next time I'm going to melt the caramel and do a drizzle.  That would allow the caramel to spread more evenly instead of pooling as it melts.

Another handy tip I've learned is that for what society would deem a "reasonable" sized cookie, you can use a melon-baller to get the rounded teaspoon measurement.  Of course, I eat these cookies two or three at a time, so, take that society.

Another multi-purpose tool is the ice cream scoop, of course.  It provides the perfect measurements for muffins and cupcakes...or for a scoop of vanilla ice cream to make these chocolate chip caramel cookies into a sandwich...enjoy!